Hanging speakers on a wall can be a great way to improve sound quality and enhance your home entertainment experience. Proper placement and secure installation are key factors in achieving optimum audio performance. I’ll share some tips on how to mount speakers on the wall to create that immersive sound experience we all strive for.
Things To Keep In Mind Before Hanging Speakers On Wall
First, it’s essential to determine the best location for your speakers. This will depend on the size and layout of your room, as well as the type of speakers you have. Keep in mind the ideal positioning for stereo and surround sound systems. For most setups, placing the speakers at ear level while you’re seated and angling them slightly towards the listening area will provide the best sound clarity.
Safety should not be overlooked. Always ensure that you choose the appropriate hardware for mounting your speakers, such as brackets, anchors, or mounts specifically designed for your speakers’ weight and size. Taking the time to carefully secure your speakers will prevent any unforeseen accidents and help to maintain their longevity. So, let’s dive right into the process of hanging those speakers on the wall for a fantastic audio experience!
Assessing Your Wall Type
Before hanging speakers on a wall, it’s essential to understand the different wall types and their characteristics. Knowing your wall type allows you to select the most suitable mounting gear and installation method for a secure fit. There are mainly three types of walls that you’ll encounter when considering speaker mounting options: drywall, brick, and concrete.

Drywall is often found in most modern homes and is relatively lighter and easier to work with when hanging speakers. Applying pressure or drilling into drywall may cause damage, so it’s crucial to find the wall studs or use appropriate anchors for support.
- Advantages of Drywall
- Easy to work with
- Requires less effort in locating studs
- Can support light to moderately heavy speakers
- Disadvantages of Drywall
- Prone to damage if not properly installed
- May require additional support depending on the speaker’s weight
Brick walls provide a sturdy base for hanging speakers but can be challenging to work with. Drilling into bricks needs special equipment like a masonry bit and hammer drill. Additionally, it’s essential to consider the grout lines for proper mounting.
- Advantages of Brick Walls
- Sturdy and durable
- Can support heavier speakers
- Resistant to damage
- Disadvantages of Brick Walls
- Requires special equipment and expertise for installation
- Limited flexibility in terms of speaker placement
Concrete walls are the most robust among the three types but are also the most time-consuming and challenging to work with. Similar to brick walls, you’ll need a hammer drill and masonry bit for drilling, along with appropriate anchors or bolts to secure the speakers.
- Advantages of Concrete Walls
- Extremely strong and durable
- Can support the heaviest speakers
- Resistant to damage and wear
- Disadvantages of Concrete Walls
- Requires special tools and expertise for installation
- Limited flexibility for speaker placement
By assessing your wall type and its characteristics, you’ll be better equipped to choose the right mounting hardware and methods to hang your speakers successfully. Remember to follow the manufacturer’s instructions for the specific speaker mounts and wall types to ensure a secure and lasting installation.
Choosing the Right Speaker Mounts
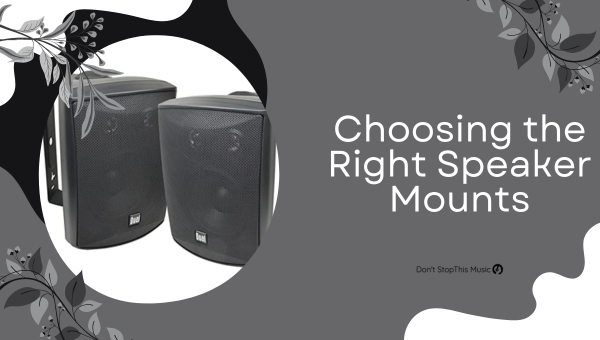
Selecting the appropriate speaker mounts for your wall is essential for achieving the best sound quality and overall aesthetics. The proper mounting system will vary based on your speaker type, wall structure, and desired placement. Let’s dive into the primary factors to consider when searching for the perfect speaker mounts.

Speaker weight and size: Before browsing for speaker mounts, gather information on your speakers’ dimensions and weight. This ensures the mounts can provide adequate support and not strain the wall. Remember, not all mounts cater to every speaker type, so compatibility is crucial.
To help with the selection process, here’s a guide to the types of mounts and their compatible speaker weights:
| Mount Type | Weight Capacity |
|---|---|
| Wall shelves | Up to 30 lbs |
| Brackets | Up to 50 lbs |
| Clamps | Up to 20 lbs |
Wall material: The wall material plays a vital role in determining the mount type and installation process. Drywall, concrete, and wooden walls each demand distinct mounting methods and hardware.
- Drywall: Use anchors for extra support, as drywalls may not be sturdy enough to handle speaker weight.
- Concrete: A hammer drill and masonry bits will be necessary since concrete walls are tougher compared to other materials.
- Wooden walls: Wood screws should suffice in fixing the mounts firmly onto the wall.
Adjustability: One must not overlook tilt and swivel features when shopping for speaker mounts. They offer flexibility and adaptability when aiming for speakers for optimal audio quality. These adjustable mounts can be especially valuable when catering to individual listeners’ preferences or when rearranging room layouts.
Installation difficulty: Finally, evaluate how handy you are with DIY projects. Consider the difficulty level of installing the speaker mounts yourself, as some mounting solutions require more technical expertise and a variety of tools. Don’t hesitate to request professional assistance if the task seems too daunting; securing mounts correctly is crucial for your speakers’ safety.
By taking into account speaker dimensions, wall material, adjustability, and installation difficulty, you’ll select speaker mounts that complement your space and deliver an optimal audio experience.
Gather Necessary Tools
Before we dive into the process of hanging speakers on the wall, it’s crucial to gather all the necessary tools. Having the right equipment in hand will not only make the task more manageable but also ensure that your speakers are securely mounted for optimal performance. Let’s take a look at some of the essential tools you’ll need for this project.
Measuring Tape: Accurate measurements are vital for proper speaker placement. A measuring tape will help you determine the right distance between the speakers, and the ideal height from the floor – this ensures optimal sound distribution.
Level: Using a level ensures that your speakers are mounted straight, avoiding any unsightly tilting or uneven positioning. An unevenly hung speaker can not only affect its performance but also its stability on the wall.
Stud Finder: This tool is indispensable for locating wall studs, which are the most secure points to hang your speakers. Hanging your speakers on studs will provide the necessary support and minimize the risk of falling or damaging your walls.
Drill & Bits: A power drill with the appropriately sized bits will make the task of drilling holes for your speaker mounts much easier. Ensure you have the correct size bit and drill for the wall material, whether it be drywall, concrete, or brick.
Hardware: You’ll need the necessary wall-mounting hardware to secure your speakers, such as brackets or mounts, screws, and anchors. These items are typically included with your speaker installation kit but double-check to ensure you have the right components for your wall type.
Here’s a quick checklist of the essential tools required:
- Measuring tape
- Level
- Stud finder
- Power drill & drill bits
- Wall-mounting hardware (brackets/mounts, screws, anchors)
It’s a good idea to have these tools ready when embarking on the project of hanging speakers on your walls – doing so will not only speed up the process but also help ensure a successful outcome. Proper installation is vital for speaker performance and maintaining the integrity of your walls, so set yourself up for success with the right equipment at your side.
Proper Speaker Placement
Hanging speakers on the wall requires proper placement to ensure optimal sound quality and performance. In this section, I’ll discuss the essential factors to consider when positioning speakers on the wall, which will greatly enhance your listening experience.
Room acoustics play a significant role in speaker performance. Before installing your speakers, it’s crucial to assess the room’s size, shape, and any potential sources of reflection or absorption. Make sure to avoid hanging speakers in corners, as this can lead to excessive bass buildup and undesirable resonances.
The listening position should also be taken into account when determining speaker placement. Typically, the ideal configuration involves forming an equilateral triangle between the two speakers and the main listening area. By doing so, you’ll achieve a well-balanced stereo image with precise localization of sound sources.
For surround sound setups, additional care must be taken to place the center channel, surround, and rear speakers. Here are some general guidelines:
- Center channel: Place the speaker directly above or below the TV or projection screen, ensuring that it’s aligned with the center of the primary seating position.
- Surround speakers: Install these on the side walls, slightly above ear level, and approximately 90-110 degrees from the primary listening area.
- Rear speakers: Position these on the back wall, roughly 135-150 degrees from the main listening area and slightly above ear level.
When it comes to the height of speaker installation, mounting them at ear level or slightly above is usually optimal. This will provide adequate sound dispersion and create a more immersive sonic experience.
To prevent visual distractions or damage to your speakers, ensure that they’re securely mounted and well-balanced on the wall. It’s essential to use suitable brackets or mounts designed specifically for your speaker model. You might also want to consider the following tips:
- Use brackets with adjustable angles to fine-tune your speaker orientation.
- Keep speaker cables concealed and organized using cable covers or conduits.
- Position speakers away from windows or other surfaces that could cause unwanted reflections or vibrations.
In summary, proper speaker placement is crucial for achieving the best possible sound performance. By taking into account room acoustics, listening position, height, and surround sound configurations, you’ll be well on your way to creating an impressive listening environment.
Attaching and Securing Speakers
When it comes to hanging speakers on the wall, I’ll guide you through the process of attaching and securing them. This helps create an immersive audio experience while saving you valuable floor space. By following these steps, you’ll have your speakers set up in no time.
1. Choose the right mounting hardware – This is crucial to ensure that your speakers stay securely mounted to the wall. Some options to consider include:
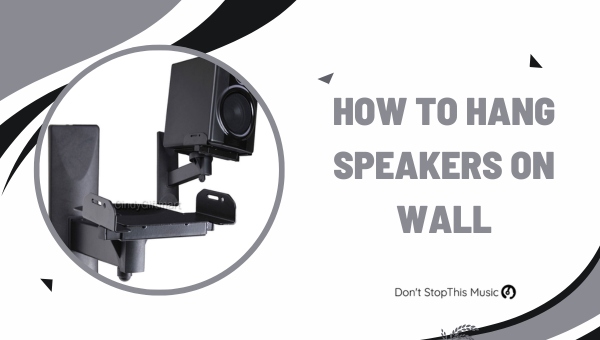
- Wall mount brackets: Typically used for bookshelf speakers, these brackets offer adjustable angles and swivels, allowing you to optimize the sound direction.
- Speaker shelves: A popular alternative to wall brackets, speaker shelves provide a solid surface for your speakers while offering additional support.
- Ceiling mounts: Ideal for surround sound systems, ceiling mounts work well when wall space is limited and an elevated position is desired for your speakers.
2. Determine the speaker placement – When deciding where to mount your speakers on the wall, consider these factors:
- Position the speakers at ear level when seated for an optimal listening experience
- For surround sound, follow the manufacturer’s guidelines for speaker angle and location
- Consider room acoustics and reflective surfaces, such as windows or walls
3. Mark the wall – After finalizing your speaker placement, use a pencil to mark the spots where the mounting hardware will go. Use a level to ensure your markings are aligned.
4. Install the mounting hardware – With your wall markings in place, start by drilling pilot holes. Different wall materials may require specific types of anchors:
- Drywall: Use appropriate drywall anchors for added support
- Brick or concrete: Consider using masonry screws and wall plugs
Once the pilot holes have been drilled, install the mounting hardware following the manufacturer’s instructions.
5. Secure the Speakers – With the hardware in place, you’re ready to secure the speakers. Attach them to the wall brackets, shelves, or ceiling mounts by following the supplied instructions. Ensure your speakers are tightly fastened to avoid any potential accidents.
6. Manage cables – Hide and secure speaker cables for a cleaner appearance using:
- Cable clips: Help guide the cables along the wall
- Cable sleeves: Cover and protect multiple cables running together
- Cable raceways: Conceal cables within a discrete casing
By following these steps, your speakers will be securely mounted on the wall, delivering an impressive audio experience in your living space.
Conclusion
Now that we’ve covered the key aspects of hanging speakers on a wall, let’s recap what we’ve learned. This task can seem daunting, but with the right preparation and knowledge, it’s rather straightforward.
To summarize, hanging speakers on a wall can greatly improve your audio experience, whether it’s for a home theater system or a listening room. Once you’ve mastered the steps mentioned in this guide, you’ll be able to install your speakers with confidence and ease, creating an enjoyable listening environment for you and your family.
I hope this information has been useful in helping you understand how to effectively hang speakers on a wall. With some practice and attention to detail, you’ll soon have a visually appealing and well-functioning audio setup. Happy listening!

